
How to Backup Laravel to Google Drive
Google Drive is a free cloud storage service to save files and directories online. It allows users to share all stored documents, files, and photos with other users. It can be accessed from multiple remote devices such as mobiles, tablets, laptops, and PCs. Google Drive is the best option for you if you can't afford a paid storage service.
SnapShooter is a web-based and powerful backup software that allows you to backup your data in a safe and secure location automatically. It provides a user-friendly, web-based control panel to manage and schedule all backup jobs.
This post will show you how to backup Laravel to Google Drive manually and using SnapShooter.
Table Of Contents
- Backup Laravel to Google Drive Manually
- Install and Configure Gdrive
- Use Gdrive to Backup Laravel to Google Drive
- Backup Laravel to Google Drive Using SnapShooter
- Connect Google Drive to SnapShooter
- Backup Laravel to Google Drive
- Conclusion
Backup Laravel to Google Drive Manually
This section will show you how to backup Laravel to Google Drive using gdrive utility.
Install and Configure Gdrive
You will need to install gdrive on the server from where you want to backup Laravel to Google Drive. Gdrive is a command-line utility used for interacting with Google Drive. With gdrive, you can manage, upload, download, delete and share files on Google Drive via the command line.
First, install the required dependencies with the following command:
apt-get install musl gnupg2 wget -yNext, download the latest version of gdrive from the GitHub using the following command:
wget https://github.com/prasmussen/gdrive/releases/download/2.1.1/gdrive_2.1.1_linux_amd64.tar.gzOnce the download is completed, extract the downloaded file with the following command:
tar -xvzf gdrive_2.1.1_linux_amd64.tar.gzNext, install the gdrive to the system path:
sudo install gdrive /usr/bin/gdriveNext, you will need to configure gdrive to access Google Drive. You can do it by running the following command:
gdrive aboutYou will get the following URL to authenticate with your Google account:
Authentication neededGo to the following url in your browser:https://accounts.google.com/o/oauth2/auth?access_type=offline&client_id=367116221053-7n0vf5akeru7on6o2fjinrecpdoe99eg.apps.googleusercontent.com&redirect_uri=urn%3Aietf%3Awg%3Aoauth%3A2.0%3Aoob&response_type=code&scope=https%3A%2F%2Fwww.googleapis.com%2Fauth%2Fdrive&state=state Enter verification code:Now, open your web browser and access the above URL. You will get the following page:
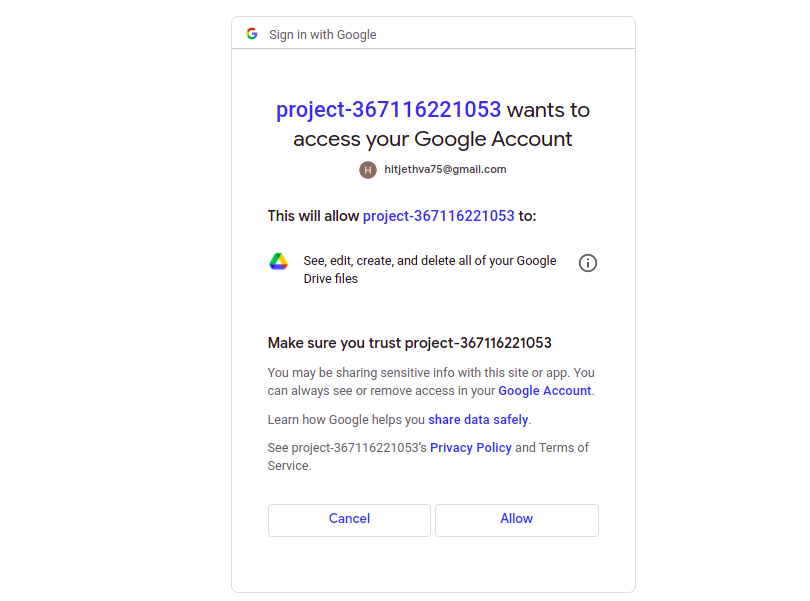
Click on the Allow button. You should see the Authorization Code on the following page:

Copy the authorization code from the above page and paste it into your command-line interface:
Enter verification code: 4/1AX4XfWgS94jN7MPU9Dt2Fb6OEoqXk3jm9F7ERte9afHx6cytD0WKYq1uYYcUser: Hitesh Jethva, hitjethva75@gmail.comUsed: 59.9 MBFree: 16.0 GBTotal: 16.1 GBMax upload size: 5.2 TBYou can verify the gdrive version using the following command:
gdrive versionYou will get the following output:
gdrive: 2.1.1Golang: go1.11.13OS/Arch: linux/amd64Use Gdrive to Backup Laravel to Google Drive
At this point, gdrive is configured to manage Google Drive. You can list all available files on your Google Drive using the following command:
gdrive listYou will get the following output:
Id Name Type Size Created1CUc3AmOVY9V4cJkNNE0ZVvdb-JOtZsnJ Article dir 2022-02-08 12:49:10First, go to the server from where you want to back up your Laravel, then log in to the MySQL using the following command:
mysql -u root -pOnce you are logged in, list all available databases using the following command:
mysql> show databases;Output:
+--------------------+| Database |+--------------------+| information_schema || mysql || performance_schema || laraveldb |+--------------------+Next, backup the laraveldb database using the following command:
mysqldump -u root -p laraveldb > laraveldb.sqlNext, upload the laraveldb.sql dump file to the Google Drive using the following command:
gdrive upload laraveldb.sqlYou will get the following output:
Uploading laraveldb.sqlUploaded 1XW60z2bOkCtdex3WveOdYCjQ7iR_qUya at 1.0 MB/s, total 1.0 MBNext, compress the Laravel data directory:
tar -cvzf laravel.tar.gz /var/www/html/laravelNext, upload the Laravel compressed file to the Google Drive:
gdrive upload laravel.tar.gzOutput:
Uploading laravel.tar.gzUploaded 1C9hsnB2eRThZKmuPWeed4R_rgMp_x62l at 6.1 MB/s, total 8.6 MBNext, run the following command to verify the uploaded files:
gdrive listYou will get the following output:
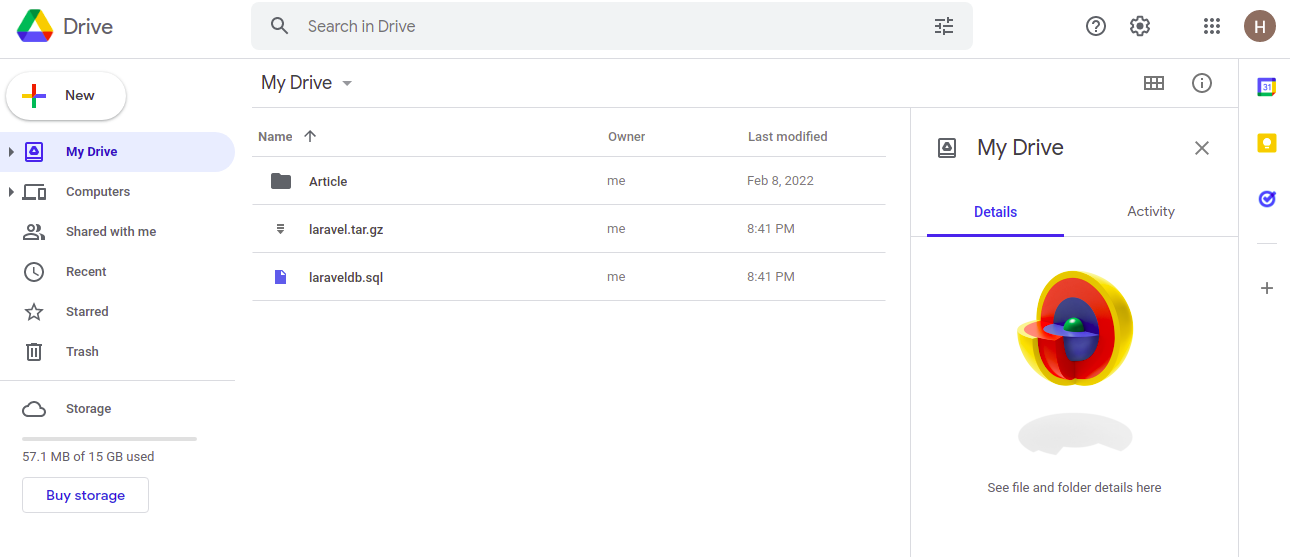
Id Name Type Size Created1C9hsnB2eRThZKmuPWeed4R_rgMp_x62l laravel.tar.gz bin 8.6 MB 2022-05-25 15:11:581XW60z2bOkCtdex3WveOdYCjQ7iR_qUya laraveldb.sql bin 1.0 MB 2022-05-25 15:11:231CUc3AmOVY9V4cJkNNE0ZVvdb-JOtZsnJ Article dir 2022-02-08 12:49:10You can also access your Google Drive via a web browser to see your uploaded backup file as shown below:
Backup Laravel to Google Drive Using SnapShooter
Manually backing up Laravel to Google Drive is very difficult for beginner users. You will always need to create and compress a backup and then manually upload it to Google Drive. You can't control and manage it automatically. In this case, SnapShooter provides an easier way to create a backup, compress it and schedule it automatically for you.
Connect Google Drive to SnapShooter
First, you will need to select Google Drive as a storage provider to store your backup, then connect it to the SnapShooter.
Step 1 - First, go to the SnapShooter website and register for their 14-day free trial.
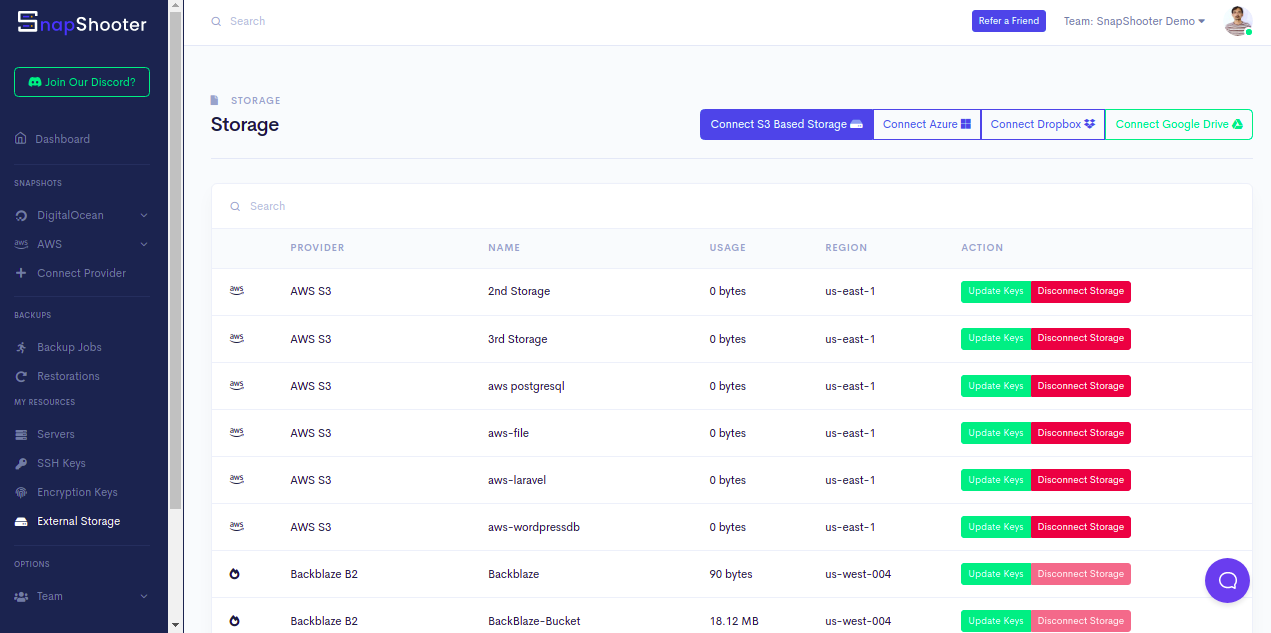
Step 2 - On the SnapShooter dashboard, click on the External Storage in the left sidebar. You should see the following screen:
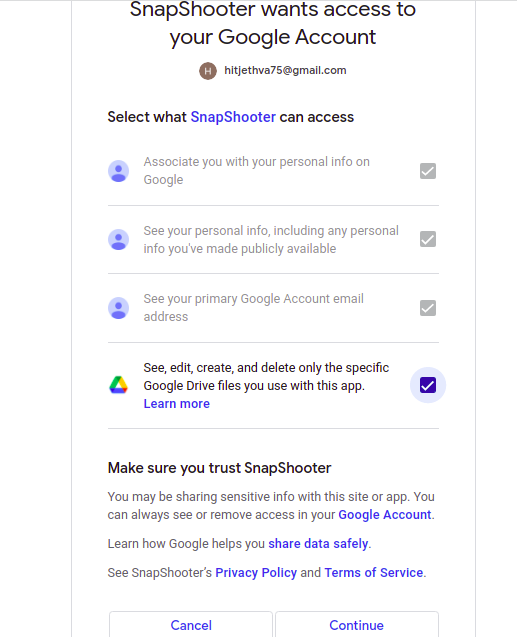
Step 3 - Click on the Connect Google Drive. You will be asked to grant SnapShooter to access your Google Drive as shown below:
Step 4 - Click on the Continue button. Once the Google Drive is connected to the SnapShooter.
Backup Laravel to Google Drive
You can now follow the below steps to backup your Laravel to Google Drive using SnapShooter.
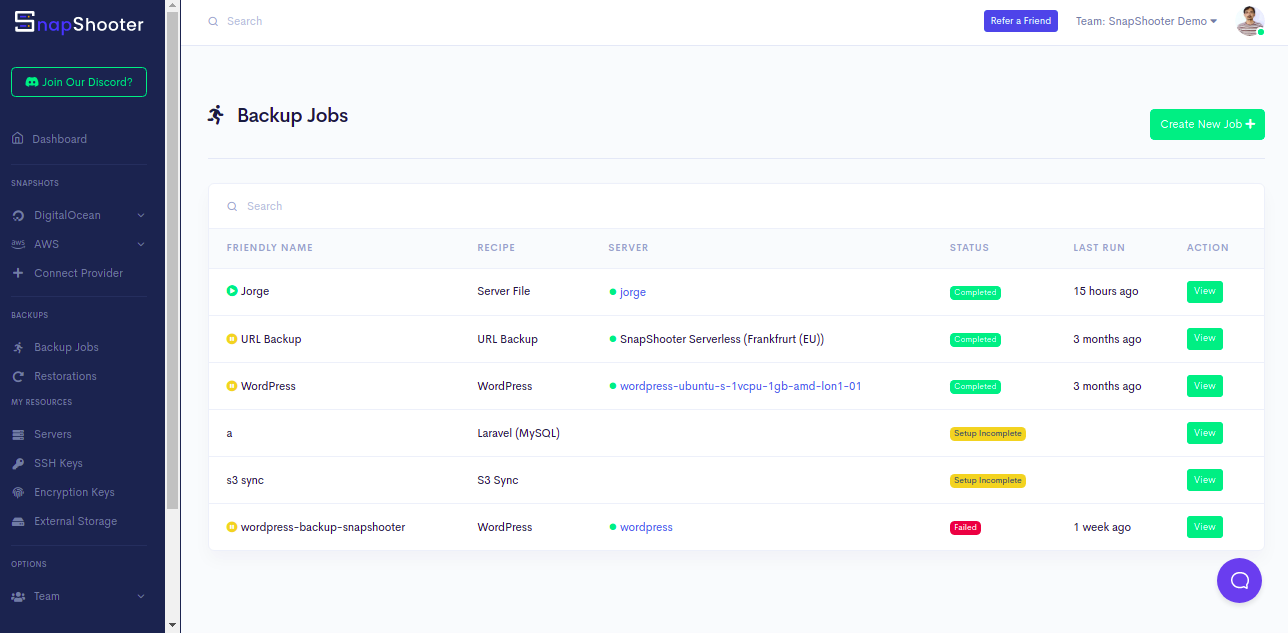
Step 1 - On the SnapShooter dashboard, click on the Backup Jobs in the left sidebar. You should see the following screen:
Step 2 - Click on the Create New Job. You should see the various option on the following screen:
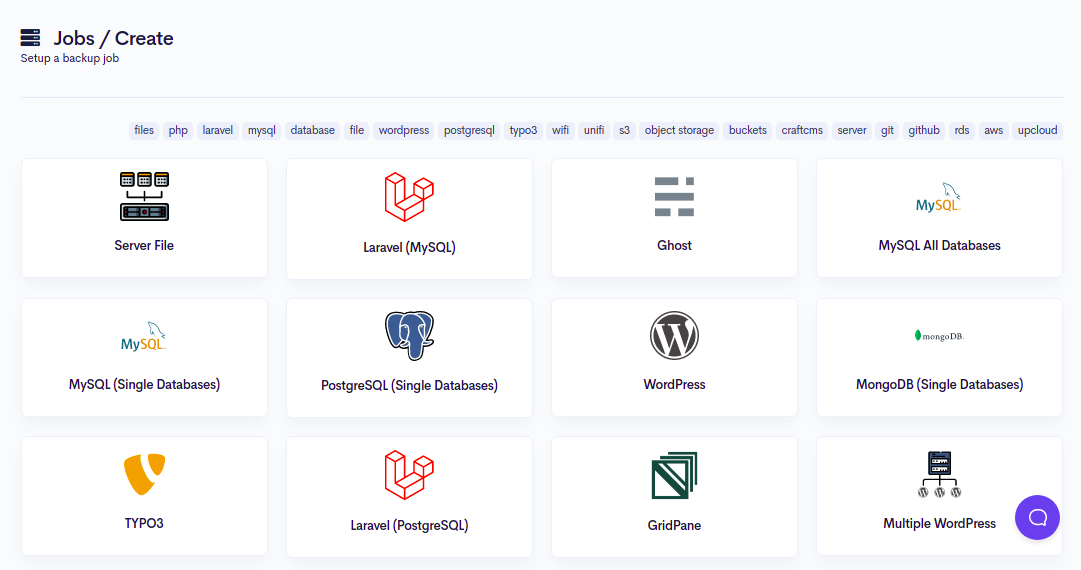
Step 3 - Click on the Laravel. You should see the following screen:
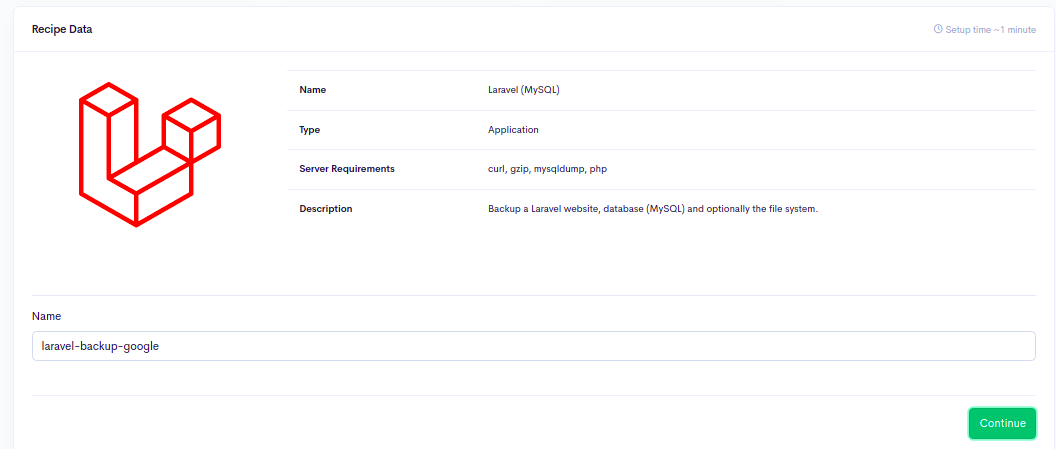
Step 4 - Click on the Continue button. You should see the Add Your Server screen:
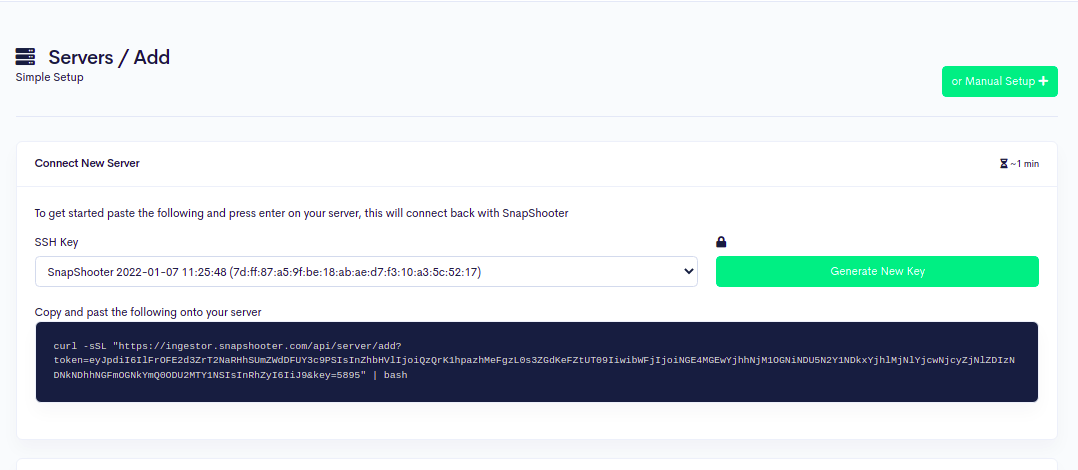
Step 5 - Now, copy the code shown on the above screen and paste it to your Laravel server as shown below:
curl -sSL "https://ingestor.snapshooter.com/api/server/add?token=eyJpdiI6Ilc0b09UbTFMU0VQTm5OQXRWa2c3ckE9PSIsInZhbHVlIjoiK3hOejdBMU1xQmJ4MjJFTlJzUVk4Zz09IiwibWFjIjoiZGVhYmE3MDlhNTNmMjRkNDFhNjYzNzU5YjM2M2VlMzFiYmIwNTY0MTBjMjg5Nzg0ZWRlNGU1NDQzZWRhNjNlNiIsInRhZyI6IiJ9&key=5895" | bashOnce your server is connected to the SnapShooter, you will get the following output:
Welcome to SnapShooter Server SetupEnvironment Detected: OS: linux, OS Type: amd64Installing SSH public keyCreating temp SSH key fileThis SSH key is already installed on this serverRemoving temp SSH key fileScanning SSH configChecking 22matched (22)SSH test confirmed, Server Added to SnapShooter ...Step 6 - Once your server is added to the SnapShooter, you should see the following screen:
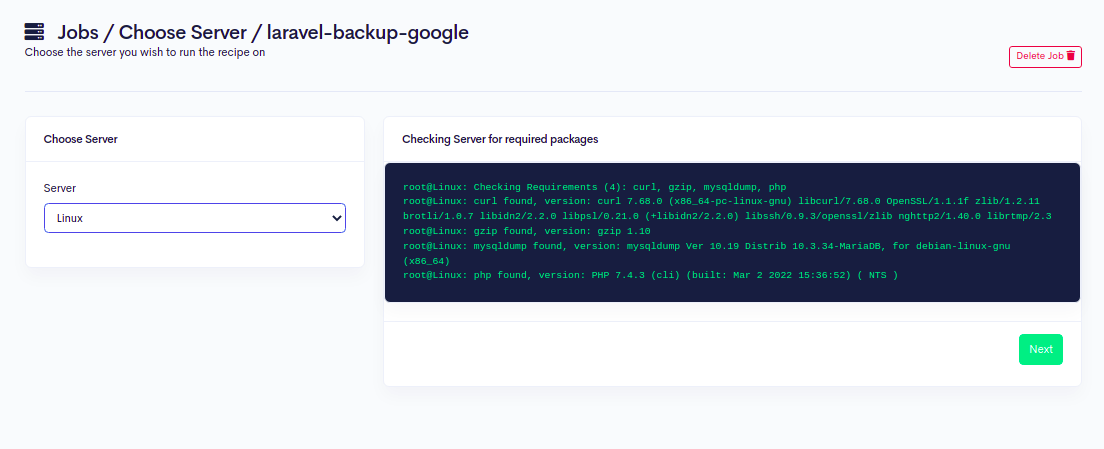
Step 7 - Click on the Next button. You should see the Laravel configuration screen:
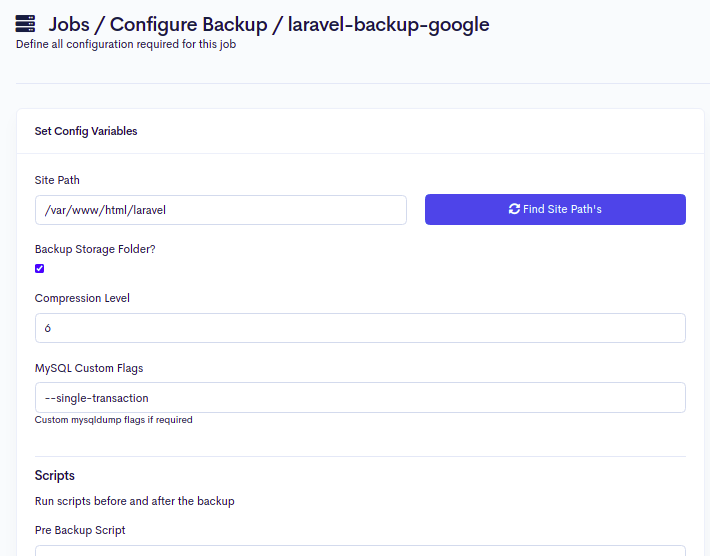
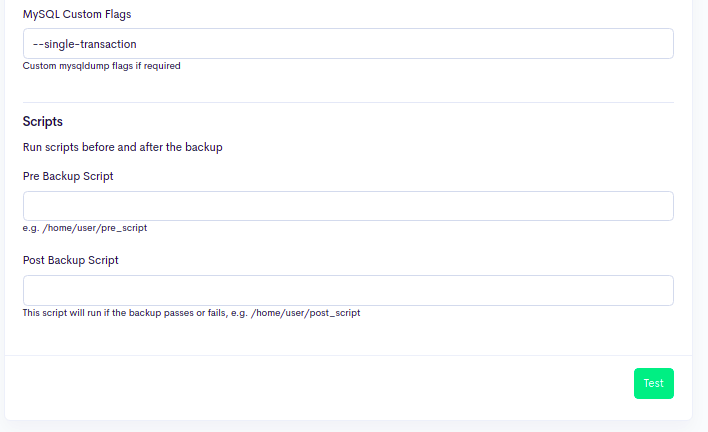
Step 8 - Provide your Laravel root directory path and click on the Test button. You should see the following screen:
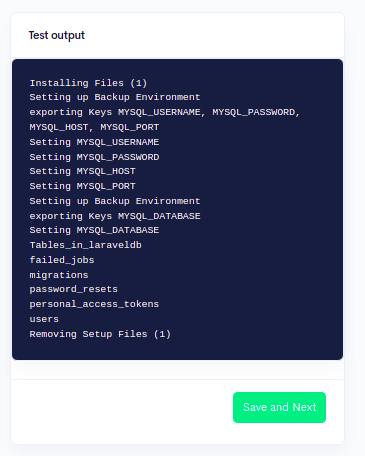
Step 9 - Click on the Save and Next button. You should see the Storage Selection screen:
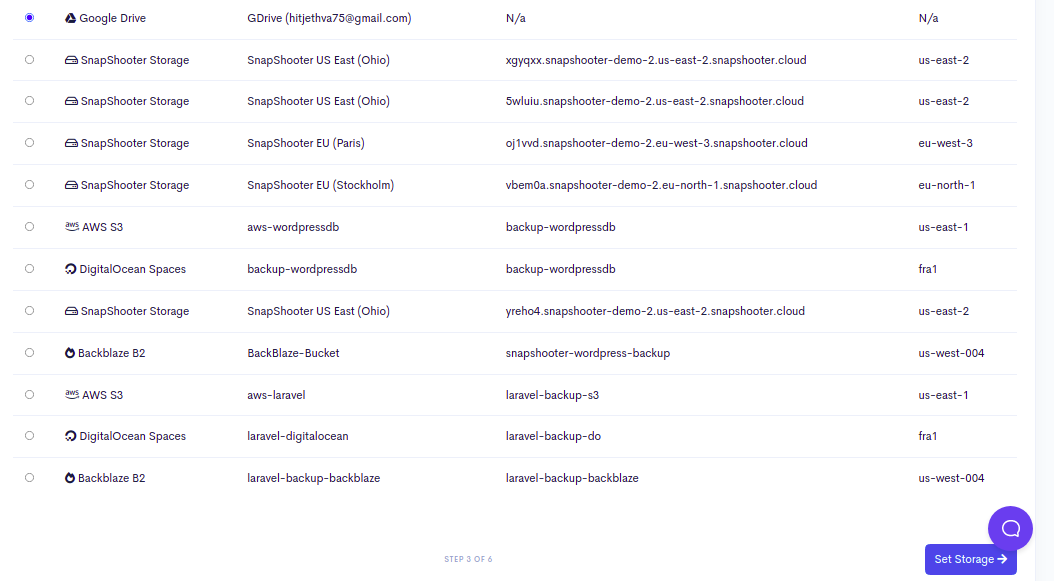
Step 10 - Select Google Drive as default storage and click on the Set Storage button. You should see the Backup Schedule Setup screen:
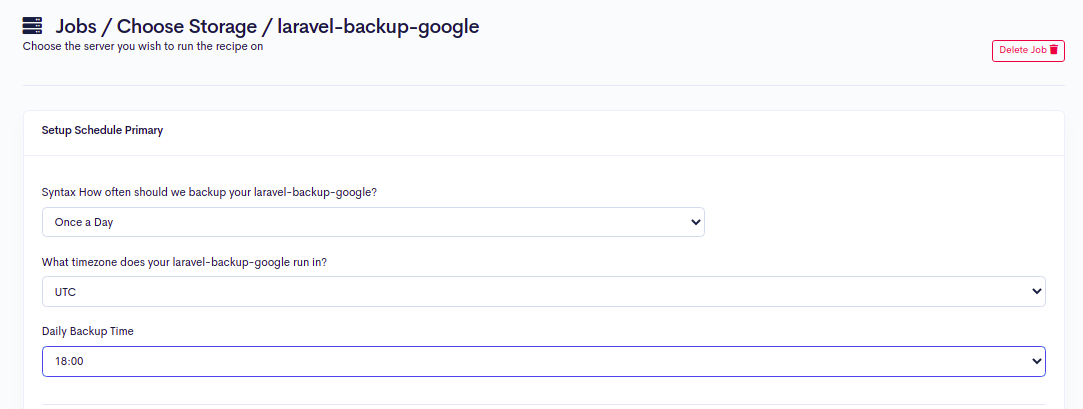
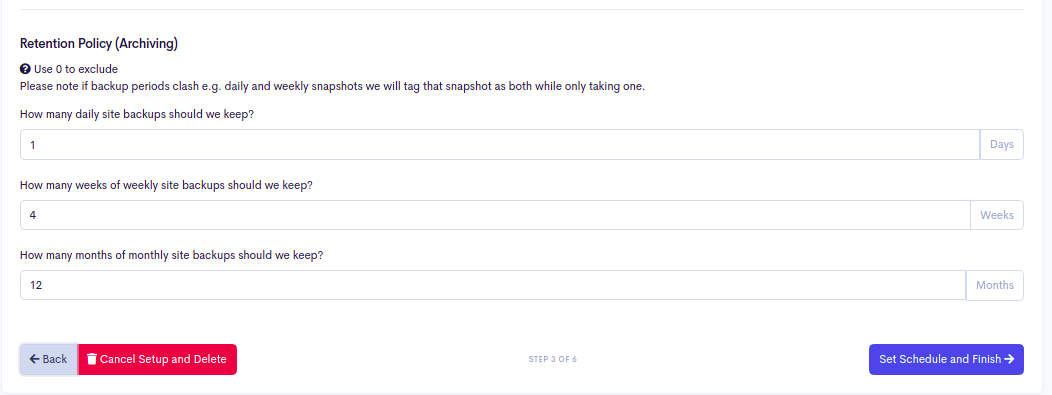
Step 11 - Select and define all options as per your requirements and click on the Set Schedule and Finish button. You should see the following screen:

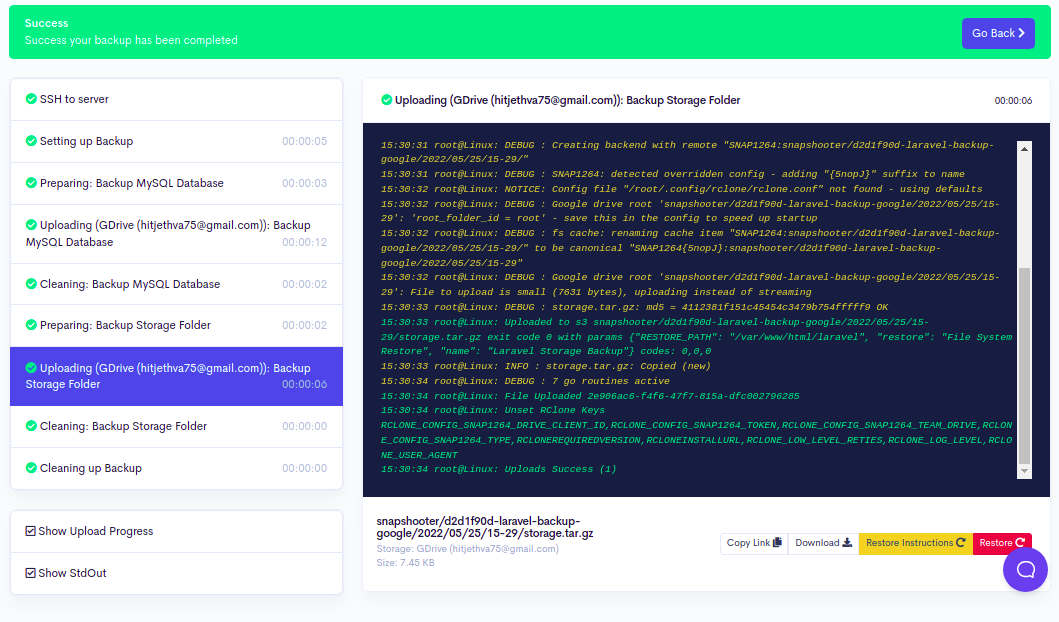
Step 12 - Click on the Backup Now button to run your first backup job. Once your backup job is executed successfully, you should see the following screen:
You can also access your Google Drive via web browser and verify your Laravel backup done by SnapShooter as shown below:

Conclusion
This guide taught you how to backup Laravel to Google Drive using SnapShooter. You can now manage and control all your backup from the SnapShooter dashboard.
Related
Thank you for helping us improve!